Pawfect Accessories 4U
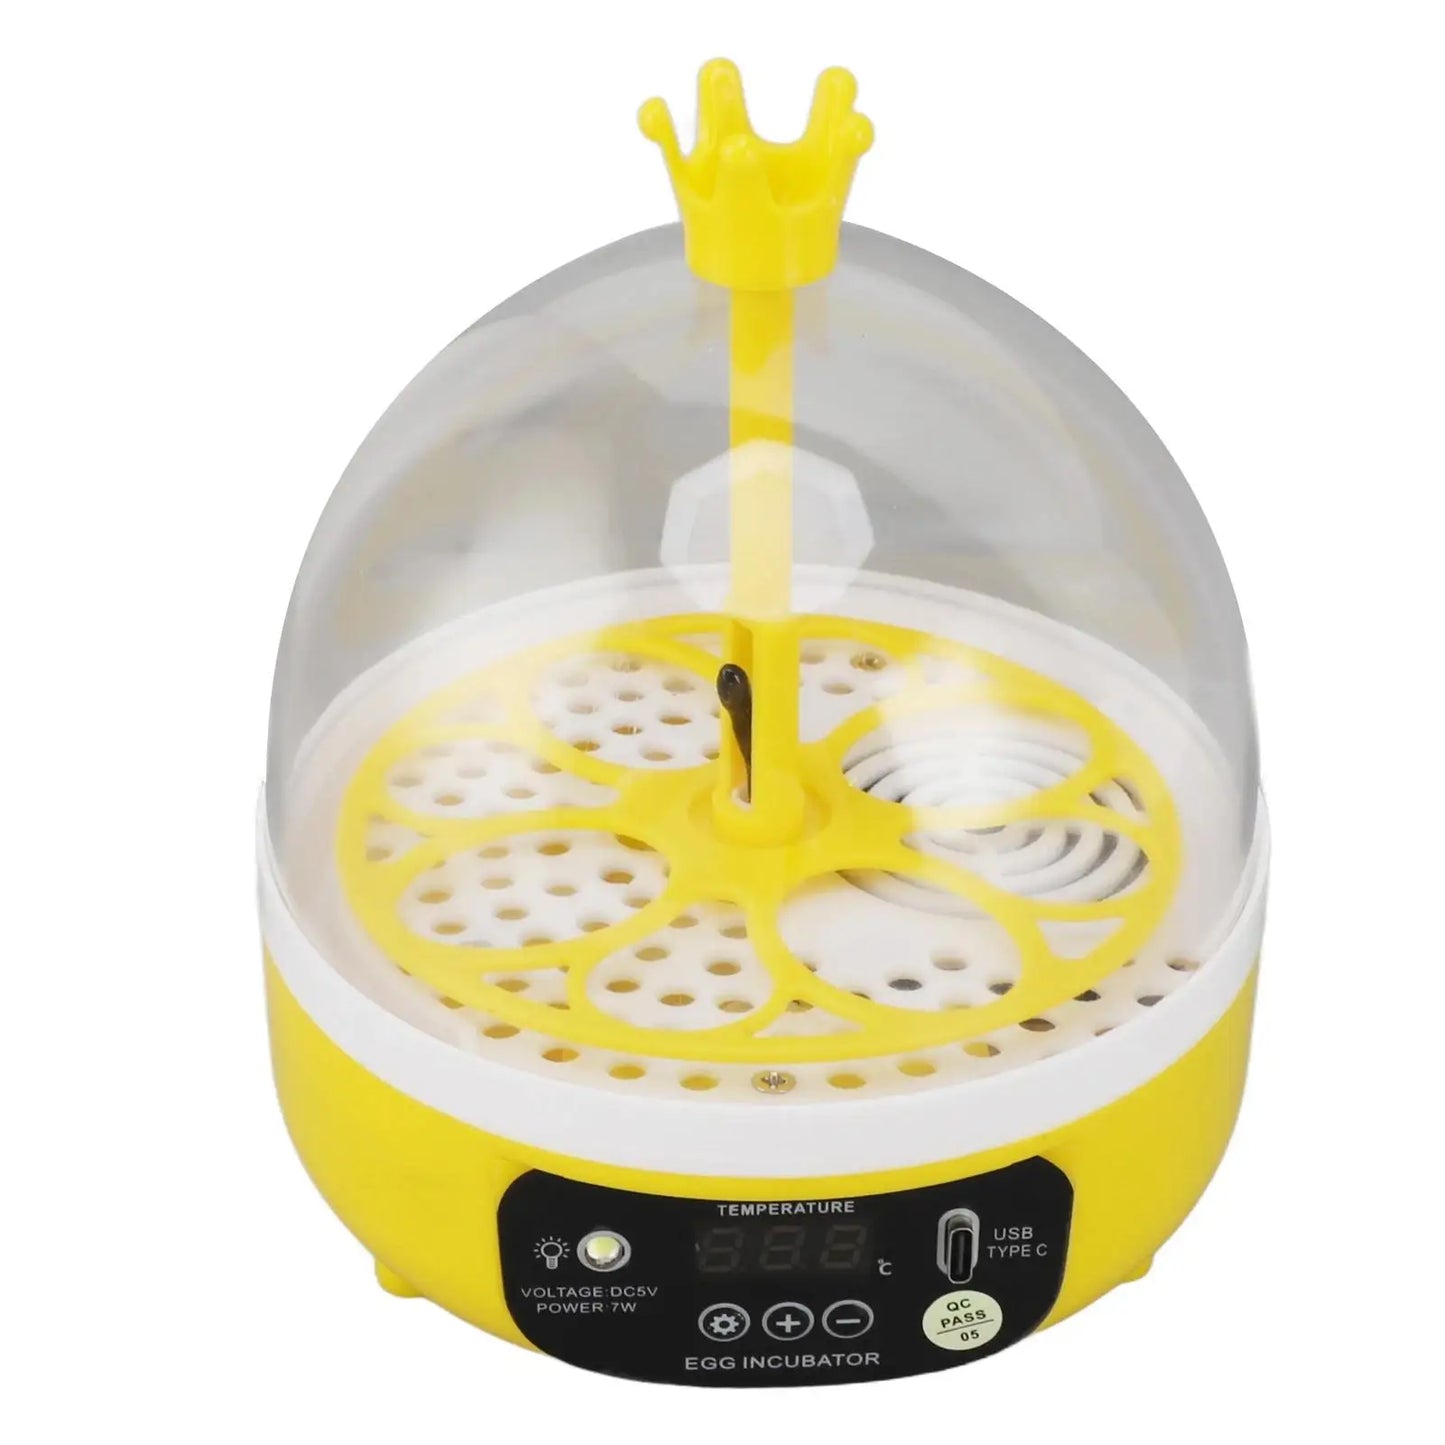
Mini Home Egg Incubator - Automatic Temperature & Humidity Control for Hatching Chicken Duck Quail Eggs Australia
Mini Home Egg Incubator - Automatic Temperature & Humidity Control for Hatching Chicken Duck Quail Eggs Australia
Regular price
$50.00 AUD
Regular price
Sale price
$50.00 AUD
Shipping calculated at checkout.
Quantity
Couldn't load pickup availability
Watch New Life Hatch Right Before Your Eyes
Ever dreamed of hatching your own chicks at home? Want to teach your kids about the miracle of life? Looking to expand your backyard flock without buying expensive day-old chicks?
The Mini Home Egg Incubator makes hatching eggs simple, affordable, and absolutely magical.
No expensive equipment. No complicated setup. No guesswork.
This compact, fully automatic incubator controls temperature and humidity for you, creating the perfect environment for eggs to hatch successfully—whether you're hatching chickens, ducks, quail, or other poultry.
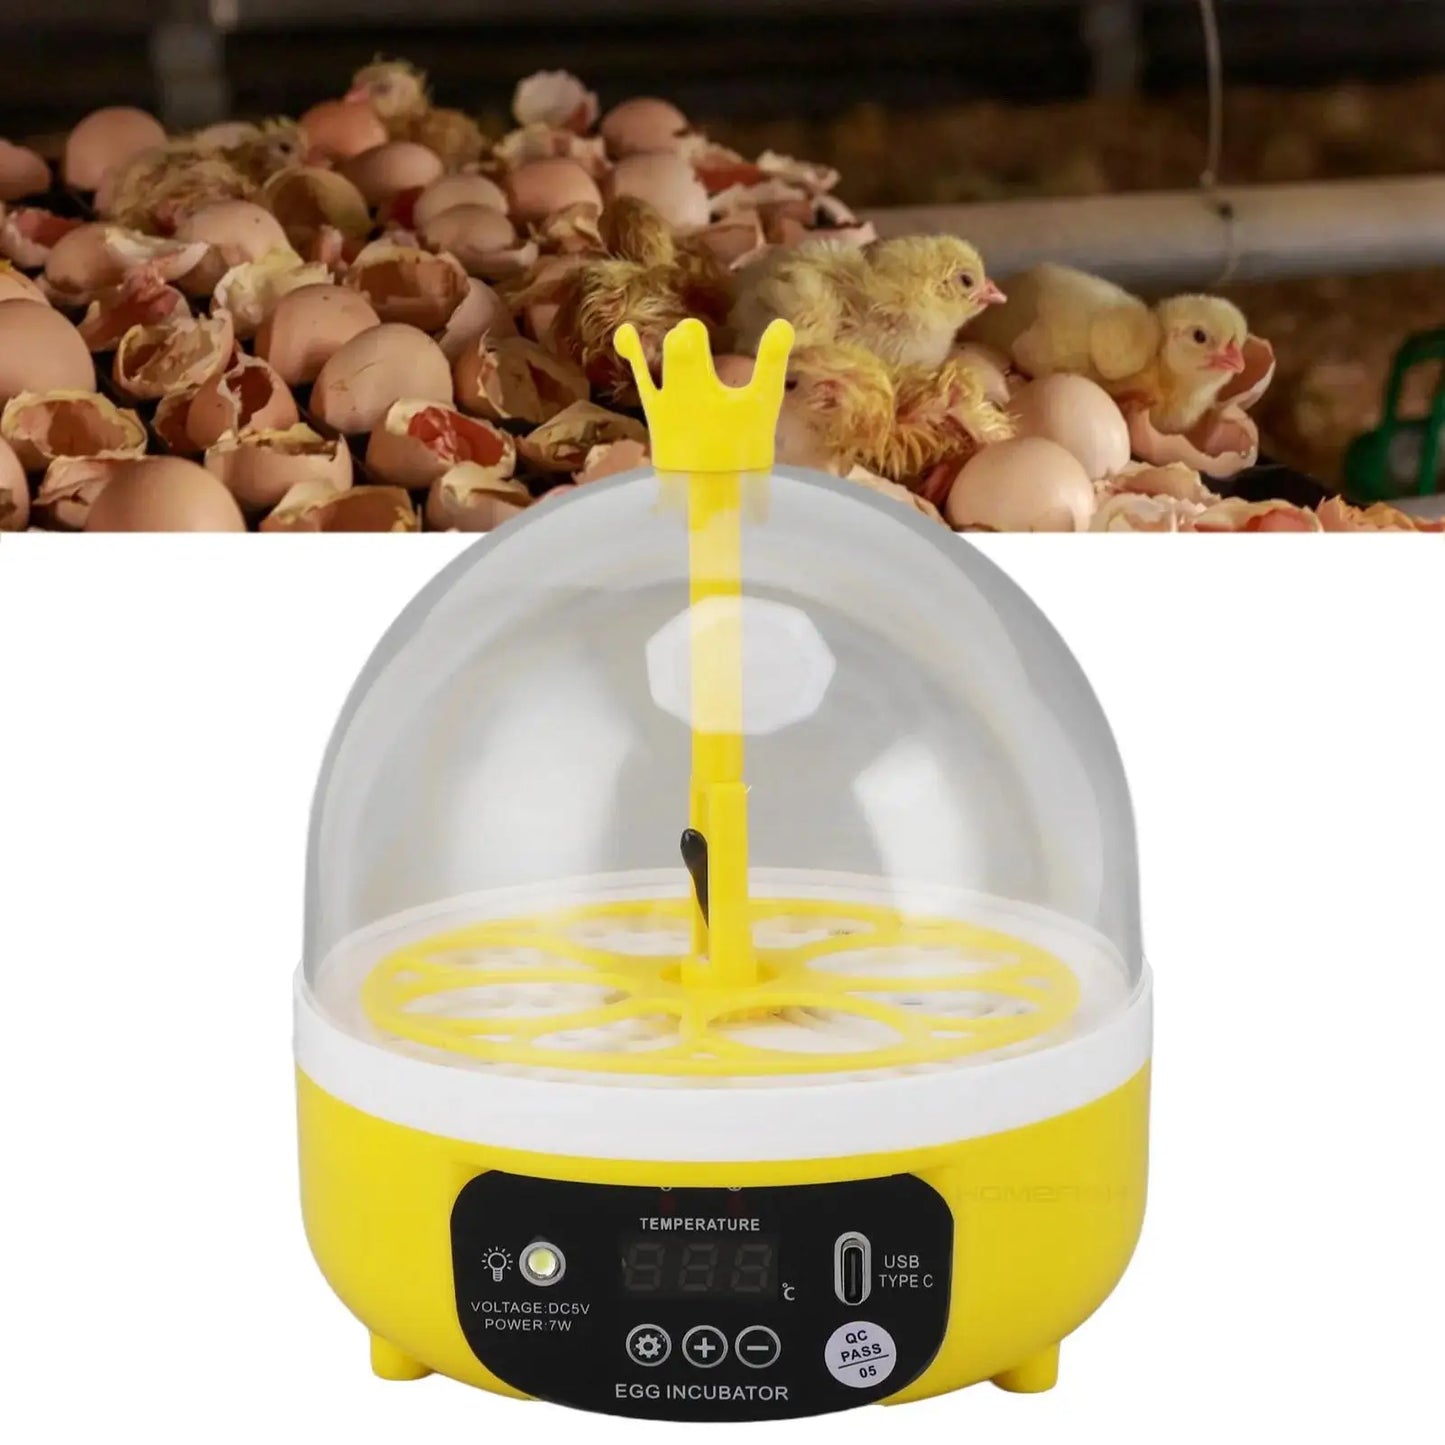
Just set it up, add your eggs, and watch nature's miracle unfold through the clear viewing window.
Perfect for beginners, families, educators, and backyard chicken keepers who want to experience the joy of hatching without the hassle of expensive, complicated incubators.
Why Families & Chicken Keepers Love This Incubator
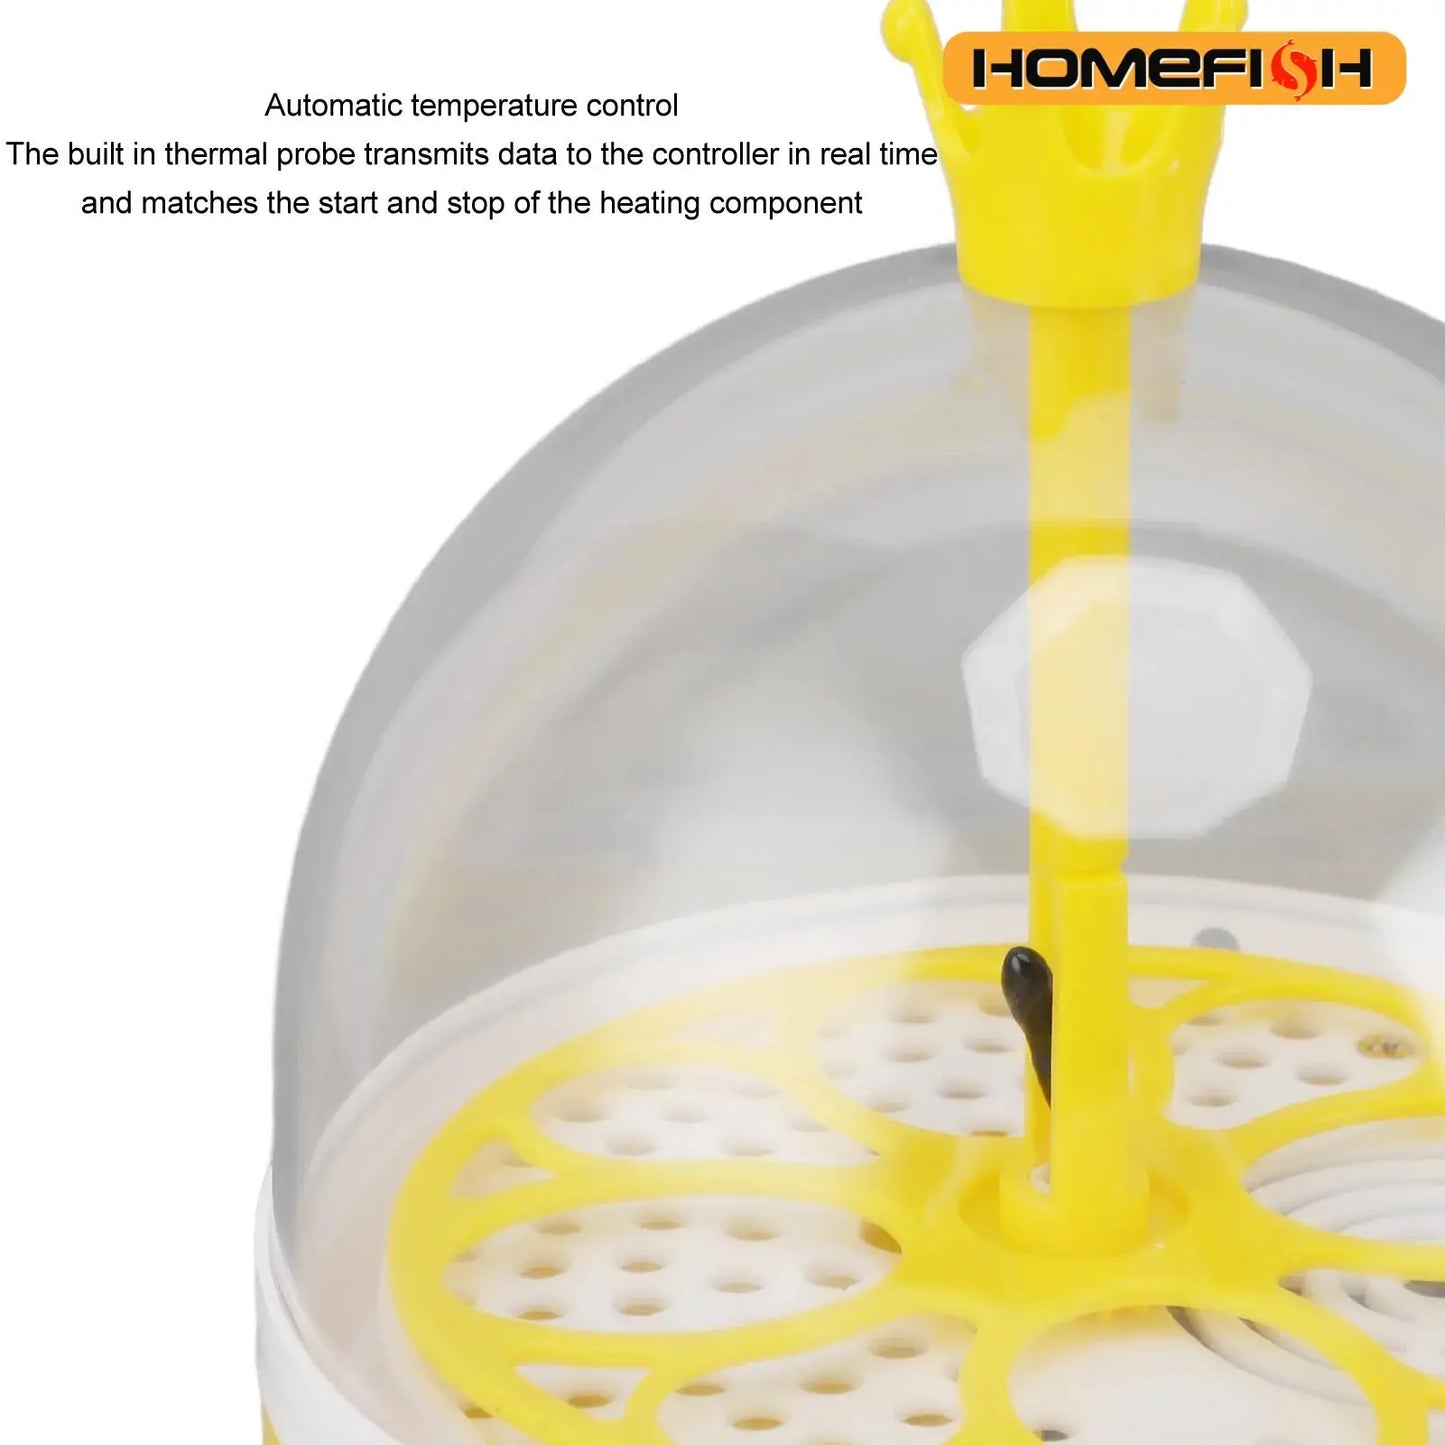
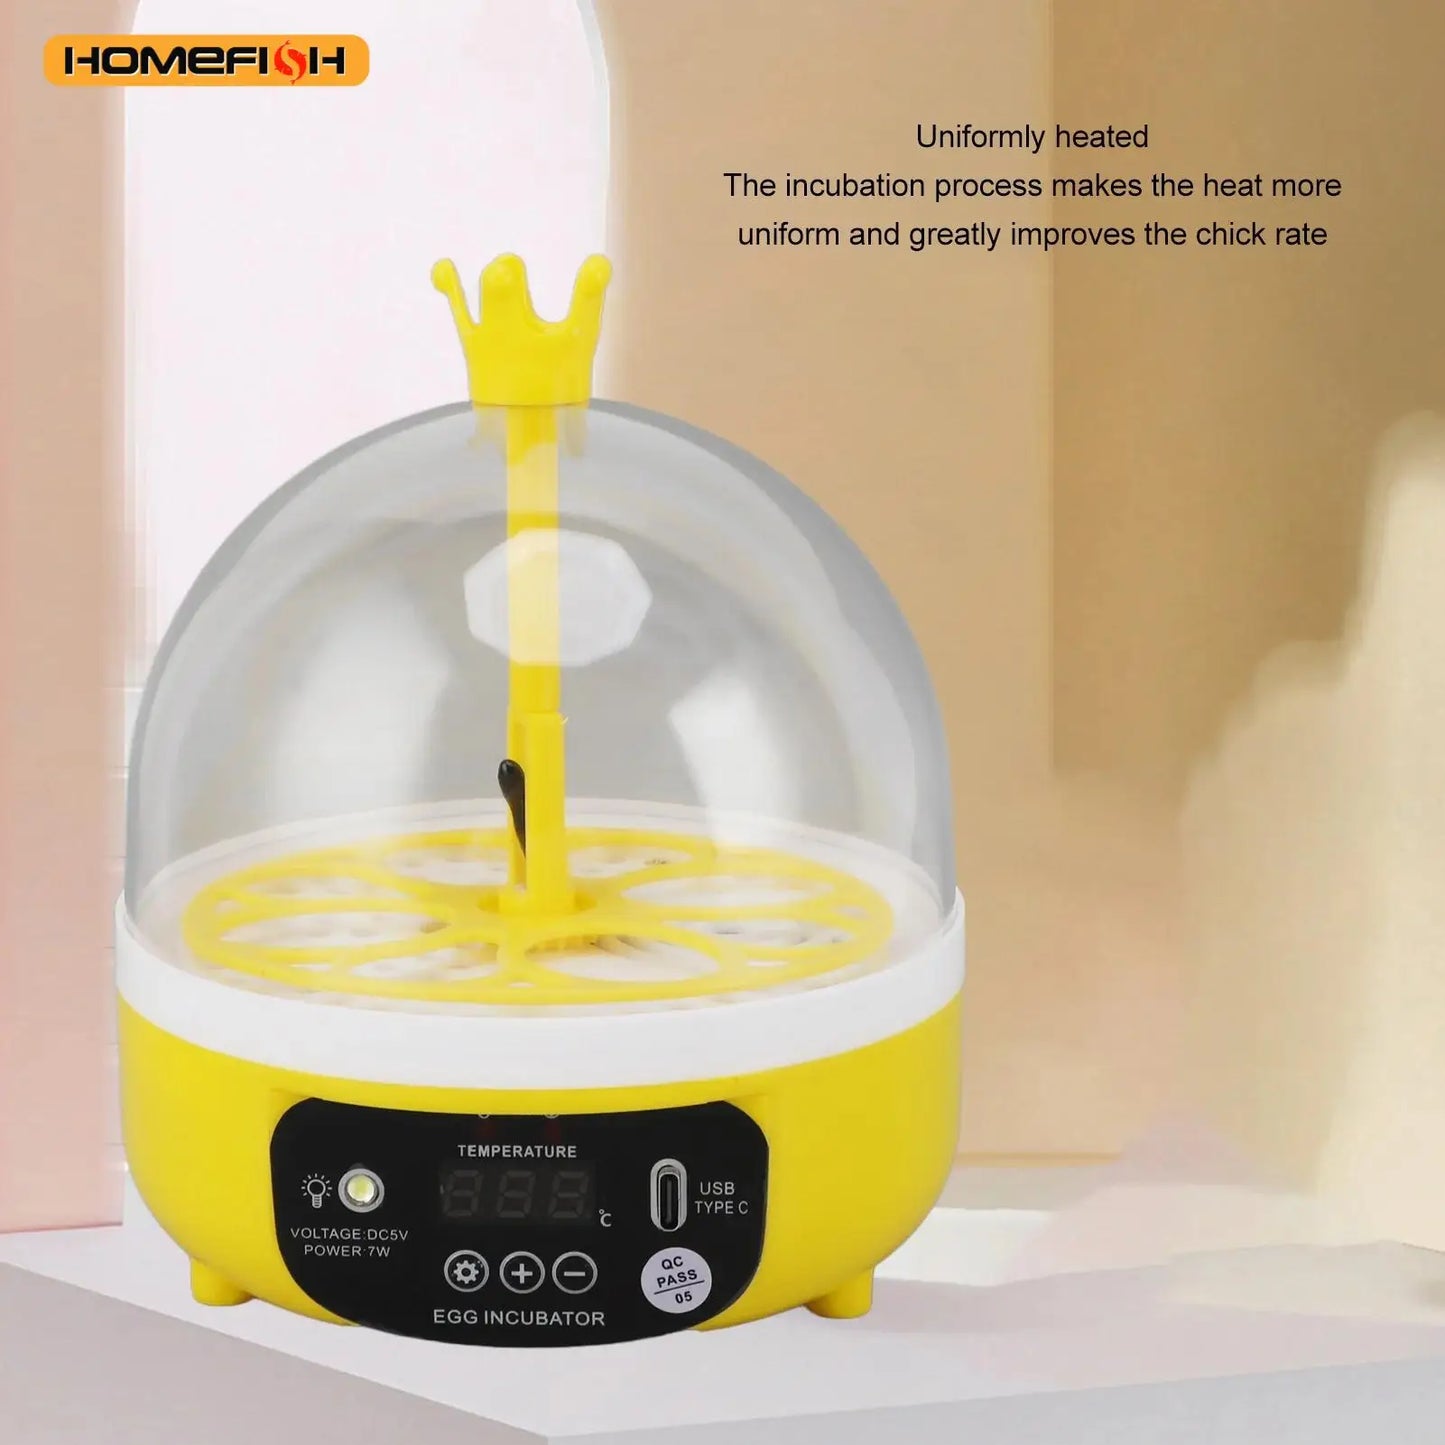
✅ Automatic Temperature & Humidity Control – Set-and-forget technology maintains optimal conditions for successful hatching. No constant monitoring or manual adjustments needed.
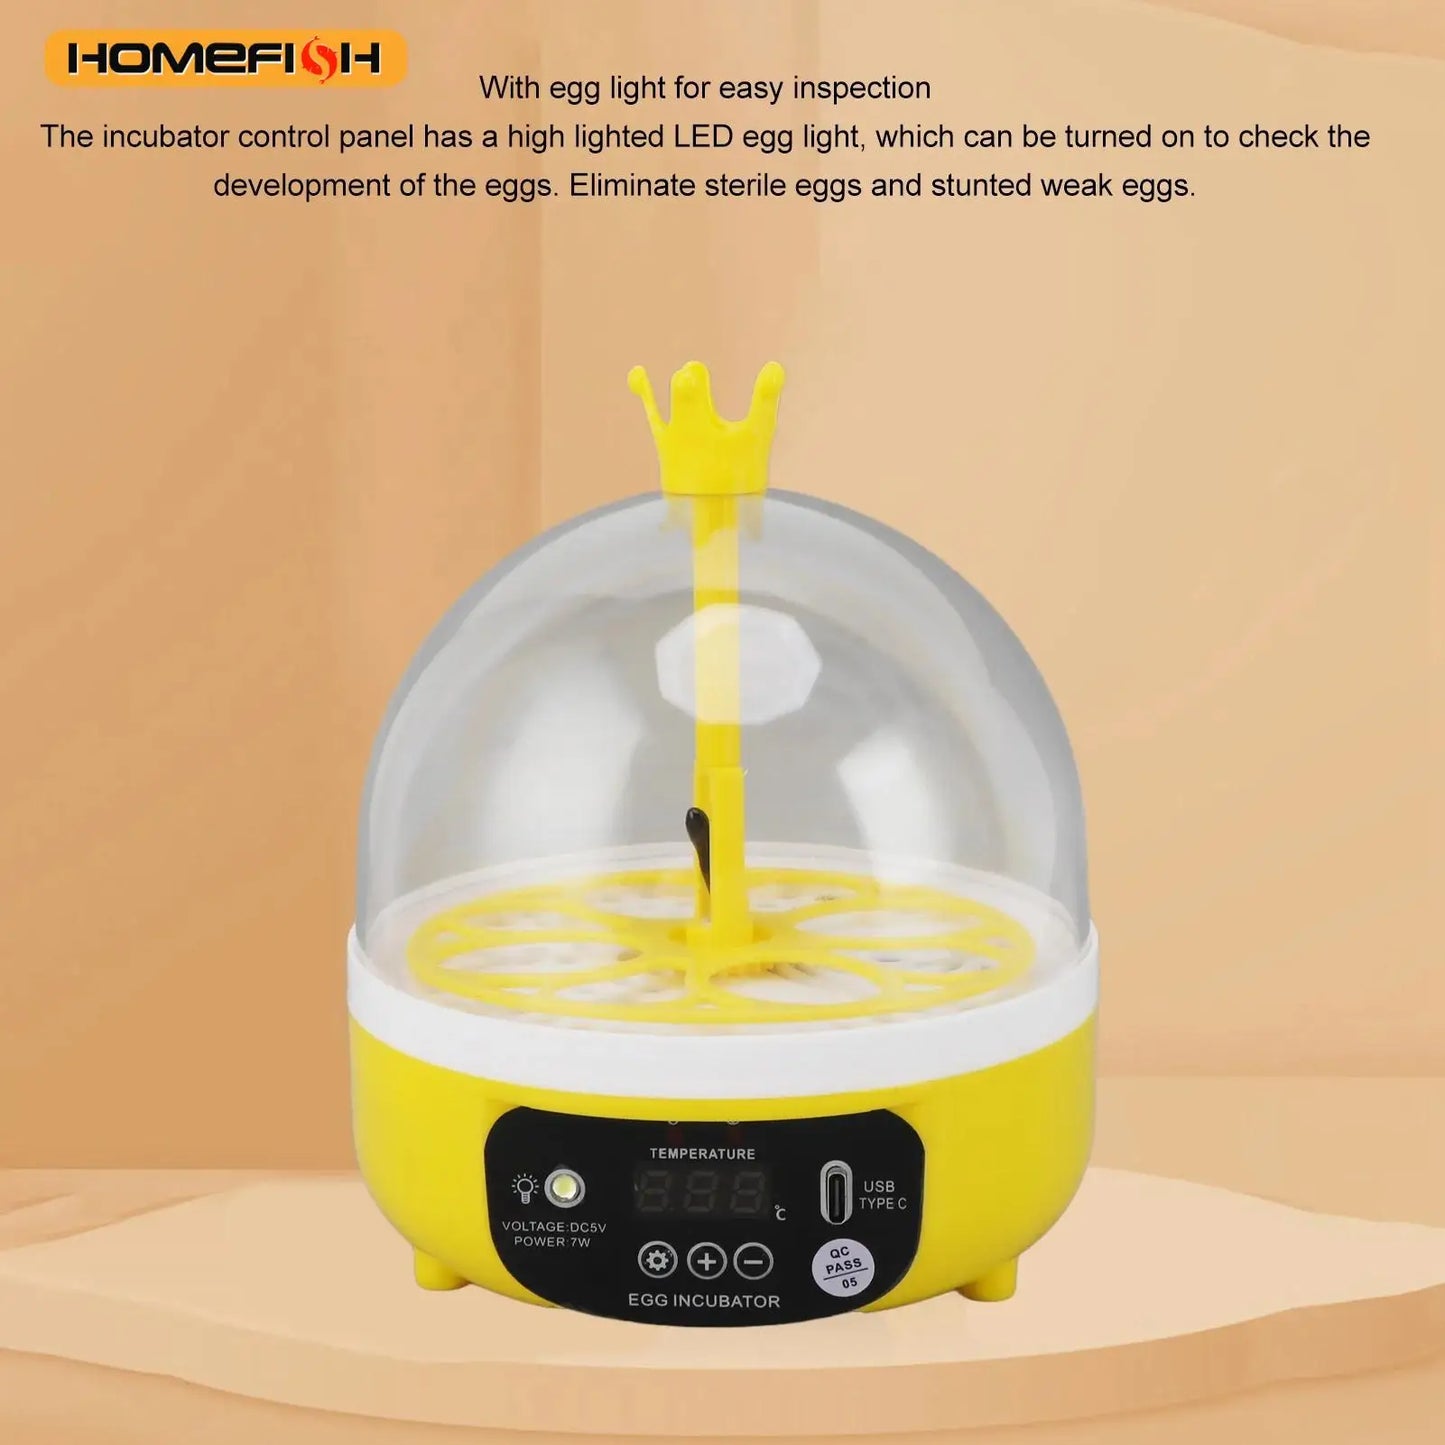
✅ Clear Viewing Window – Watch the entire hatching process! Kids (and adults!) can see eggs develop, pip, and hatch without opening the lid and disrupting conditions.
✅ Perfect for Beginners – Simple setup with easy-to-follow English instructions. No prior hatching experience required.
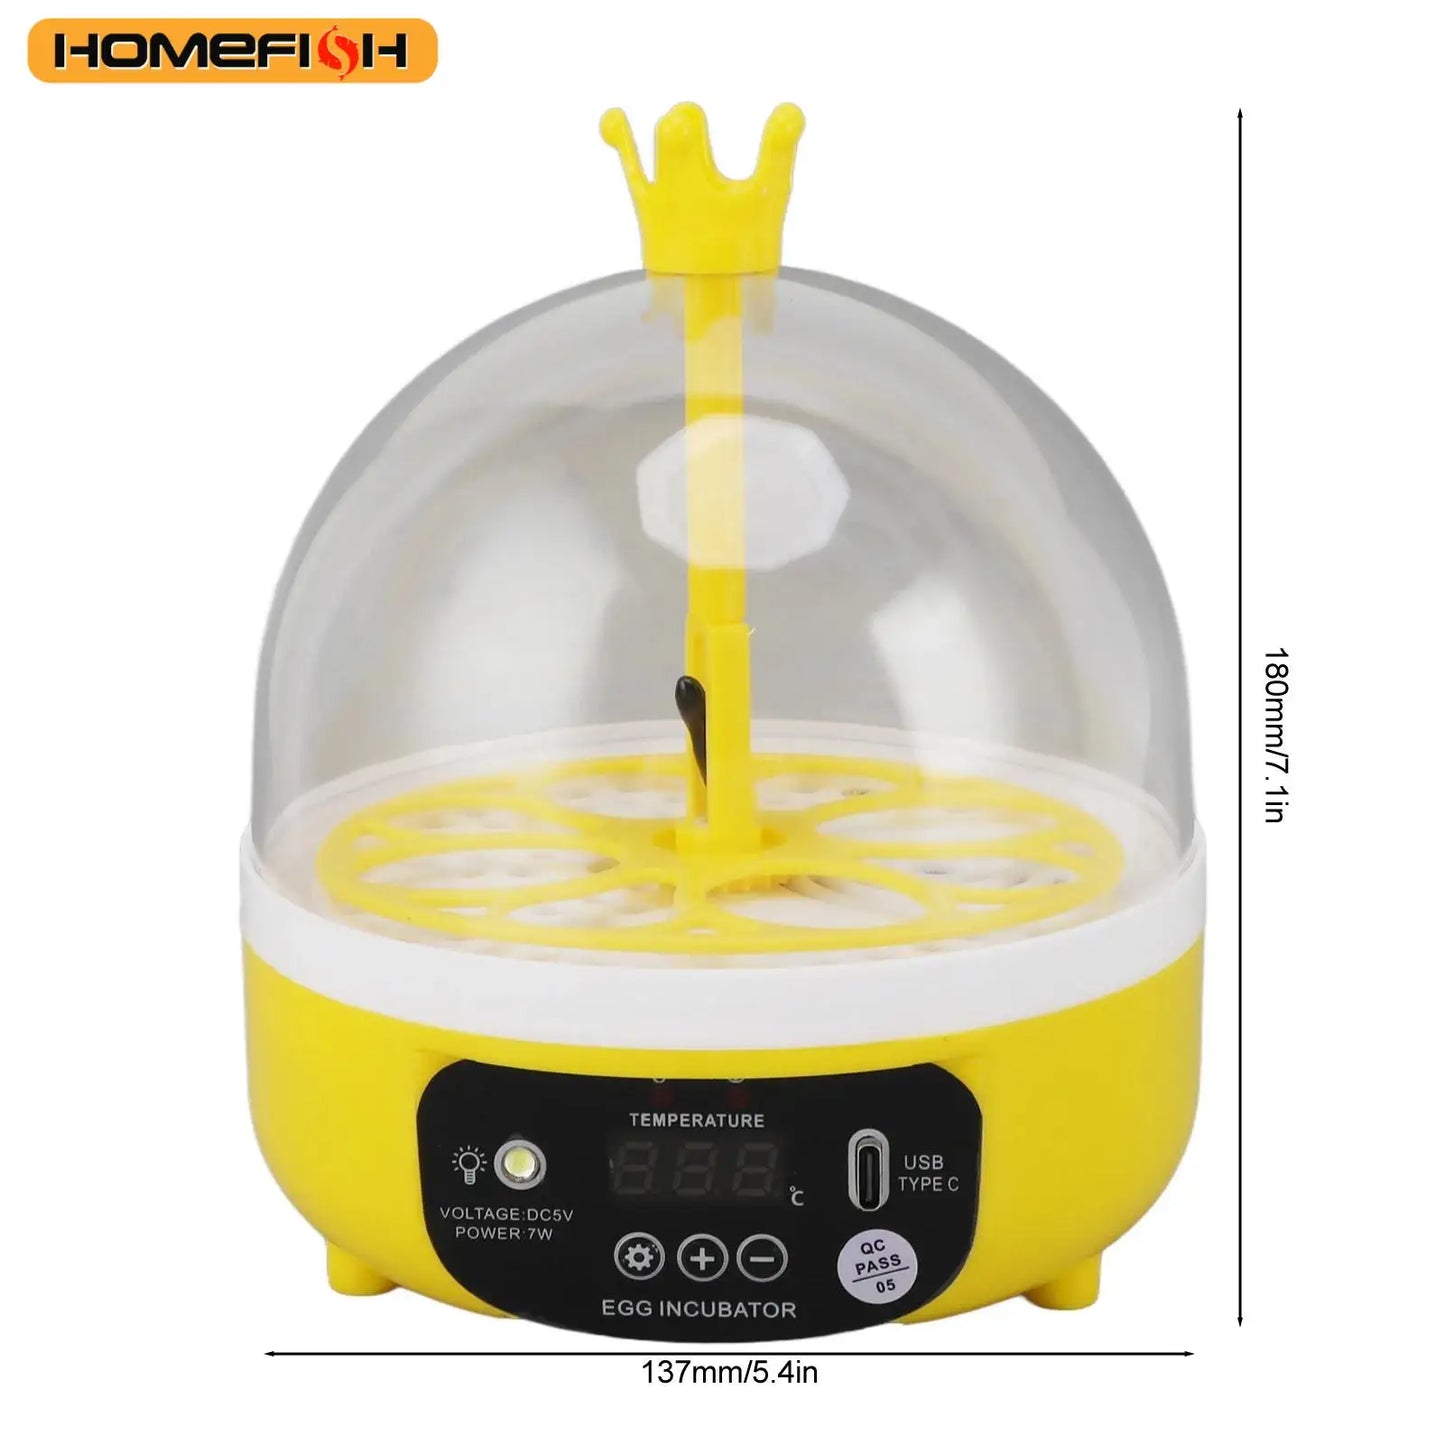
✅ Compact & Portable – Small enough for your kitchen counter, classroom desk, or outdoor workspace. Take it anywhere!
✅ Works with Multiple Egg Types – Hatch chicken, duck, quail, goose, turkey, and other poultry eggs. Versatile for any backyard flock.
✅ Quiet Operation – Runs silently in the background. Won't disturb your home, classroom, or workspace.
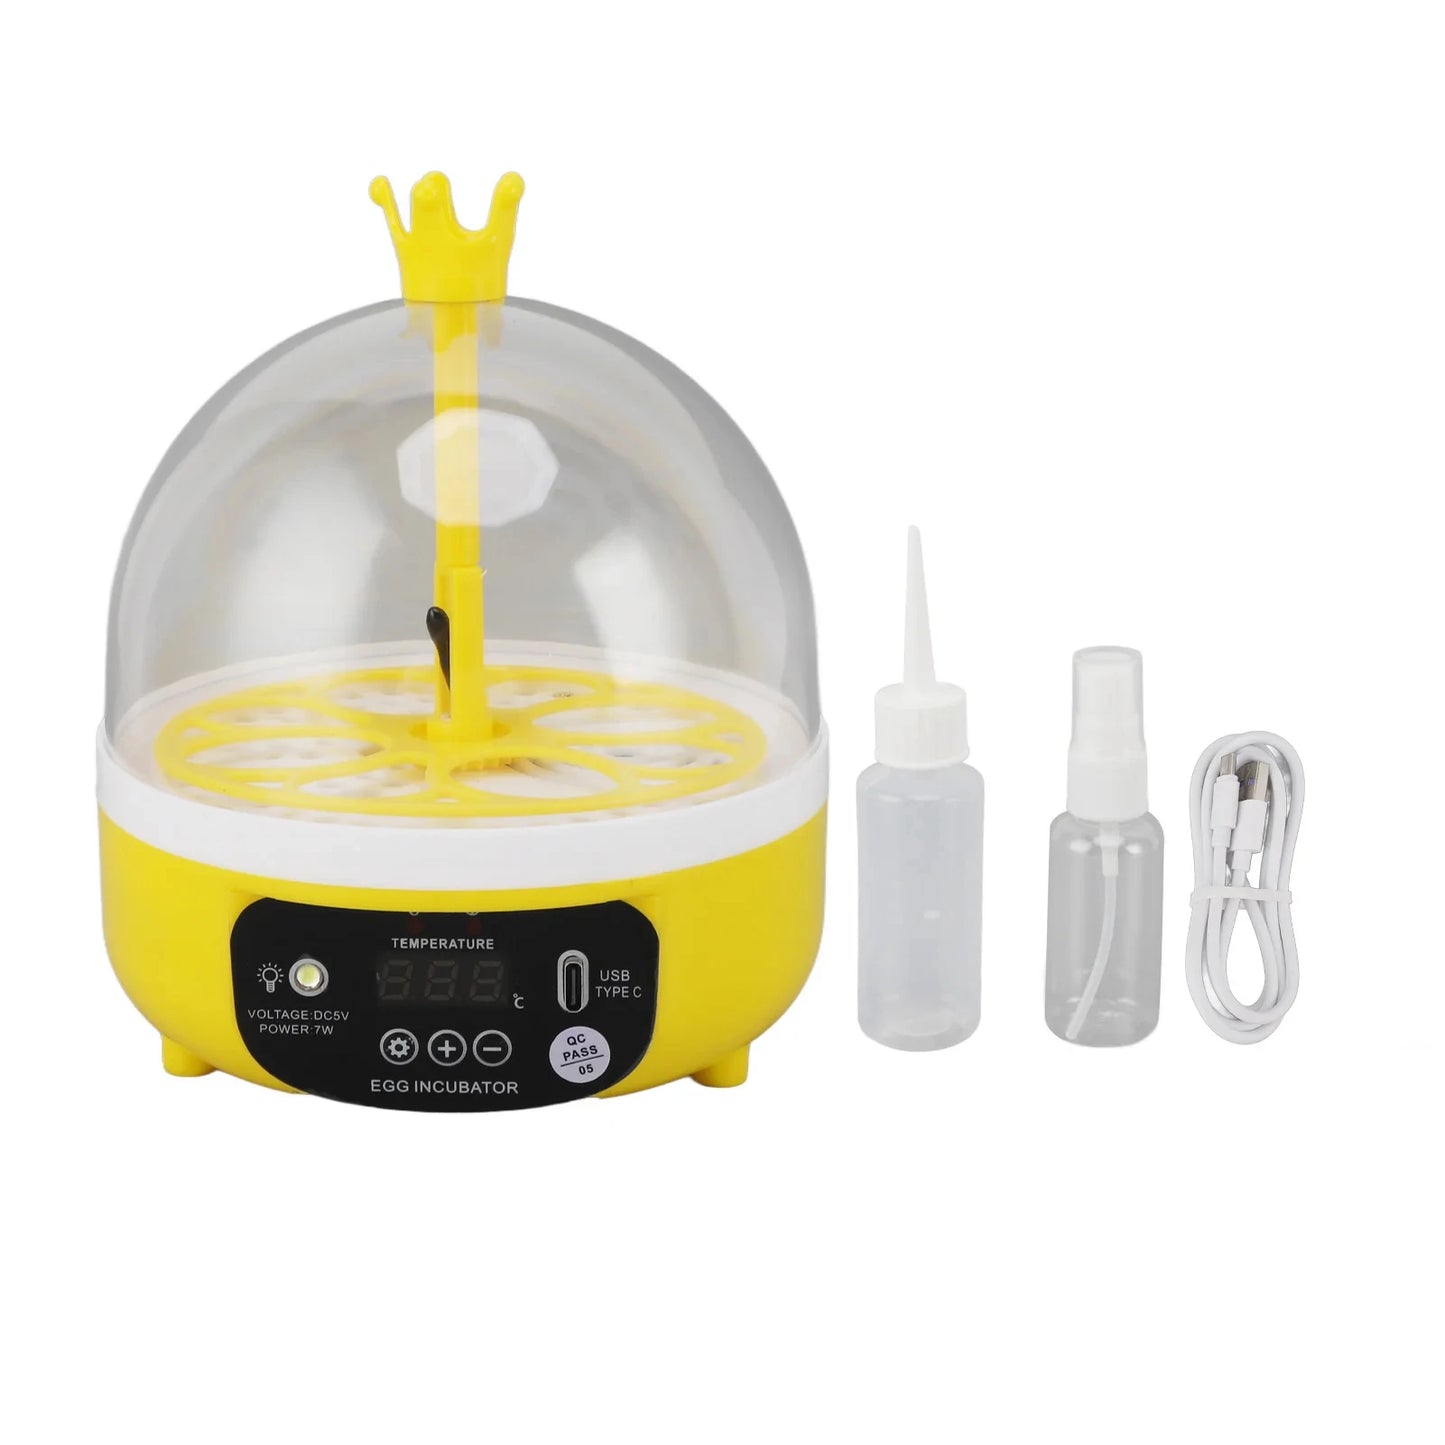
✅ Complete Starter Kit – Includes everything you need: incubator, 2 insulation foams, spray bottle, squeeze bottle, USB cable with adapter, and English instruction guide.
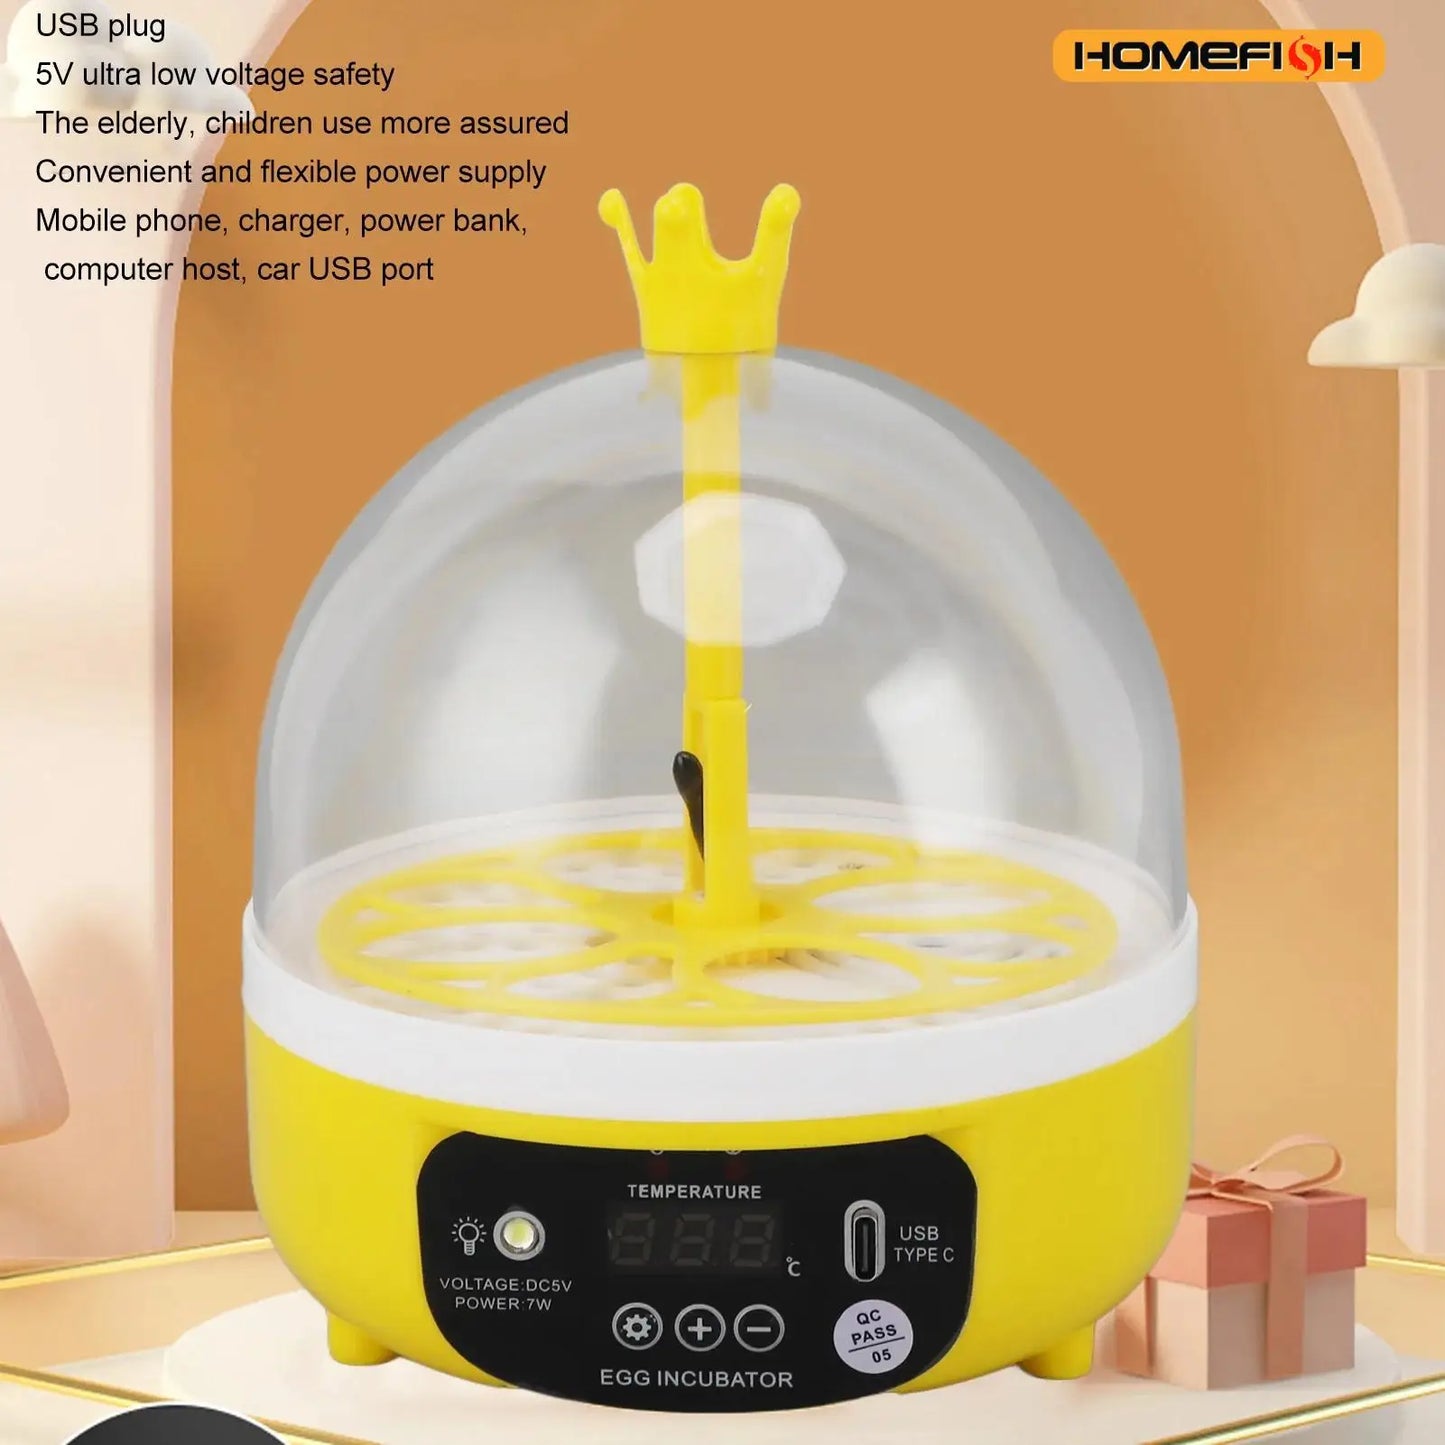
✅ USB Powered – Plug into any USB power source (wall adapter, power bank, computer). No special electrical setup required.
✅ Educational & Fun – Perfect for homeschooling, classroom science projects, or teaching kids about life cycles and responsibility.
✅ Affordable Alternative – Costs a fraction of professional incubators while delivering reliable results for small batches.
Perfect For:
🐣 Backyard Chicken Keepers – Expand your flock naturally by hatching your own chicks instead of buying expensive day-olds.
🐣 Families & Kids – Create unforgettable memories watching eggs hatch together. A hands-on learning experience kids will never forget.
🐣 Homeschoolers & Educators – Teach biology, life cycles, and responsibility with a real-life science project that captivates students.
🐣 First-Time Hatchers – Beginner-friendly design with automatic controls makes your first hatching experience stress-free and successful.
🐣 Hobby Farmers – Hatch rare breeds, specialty poultry, or small batches without investing in large commercial incubators.
🐣 Gift Givers – Unique, educational gift for kids, teachers, or anyone who loves animals and nature.
🐣 Classroom Projects – Bring science to life! Students can observe embryo development and witness live hatching in real-time.
🐣 Duck & Quail Enthusiasts – Not just for chickens! Works beautifully for ducks, quail, and other small poultry eggs.
The Problems This Incubator Solves:
❌ Problem: Buying day-old chicks is expensive and limits breed choices
✅ Solution: Hatch your own chicks from fertile eggs—more affordable and access to rare breeds
✅ Solution: Hatch your own chicks from fertile eggs—more affordable and access to rare breeds
❌ Problem: Professional incubators cost hundreds of dollars
✅ Solution: Compact mini incubator delivers reliable results at a fraction of the cost
✅ Solution: Compact mini incubator delivers reliable results at a fraction of the cost
❌ Problem: Manual incubators require constant monitoring and adjustments
✅ Solution: Automatic temperature and humidity control—set it and forget it
✅ Solution: Automatic temperature and humidity control—set it and forget it
❌ Problem: Kids can't see what's happening inside traditional incubators
✅ Solution: Clear viewing window lets everyone watch the magic of hatching without disrupting conditions
✅ Solution: Clear viewing window lets everyone watch the magic of hatching without disrupting conditions
❌ Problem: Complicated setup and confusing instructions
✅ Solution: Simple plug-and-play design with easy-to-follow English guide—ready in minutes
✅ Solution: Simple plug-and-play design with easy-to-follow English guide—ready in minutes
❌ Problem: No space for large, bulky incubators
✅ Solution: Compact, portable design fits on kitchen counters, desks, or shelves
✅ Solution: Compact, portable design fits on kitchen counters, desks, or shelves
❌ Problem: Uncertain if eggs will actually hatch
✅ Solution: Automatic controls create optimal conditions for maximum hatch success rates
✅ Solution: Automatic controls create optimal conditions for maximum hatch success rates
❌ Problem: Want to teach kids about life but don't know how
✅ Solution: Hands-on educational experience that teaches biology, responsibility, and patience
✅ Solution: Hands-on educational experience that teaches biology, responsibility, and patience
How It Works:
Step 1: Place the incubator on a stable, level surface away from direct sunlight and drafts.
Step 2: Add warm water to the water reservoir using the included squeeze bottle (follow water level markings).
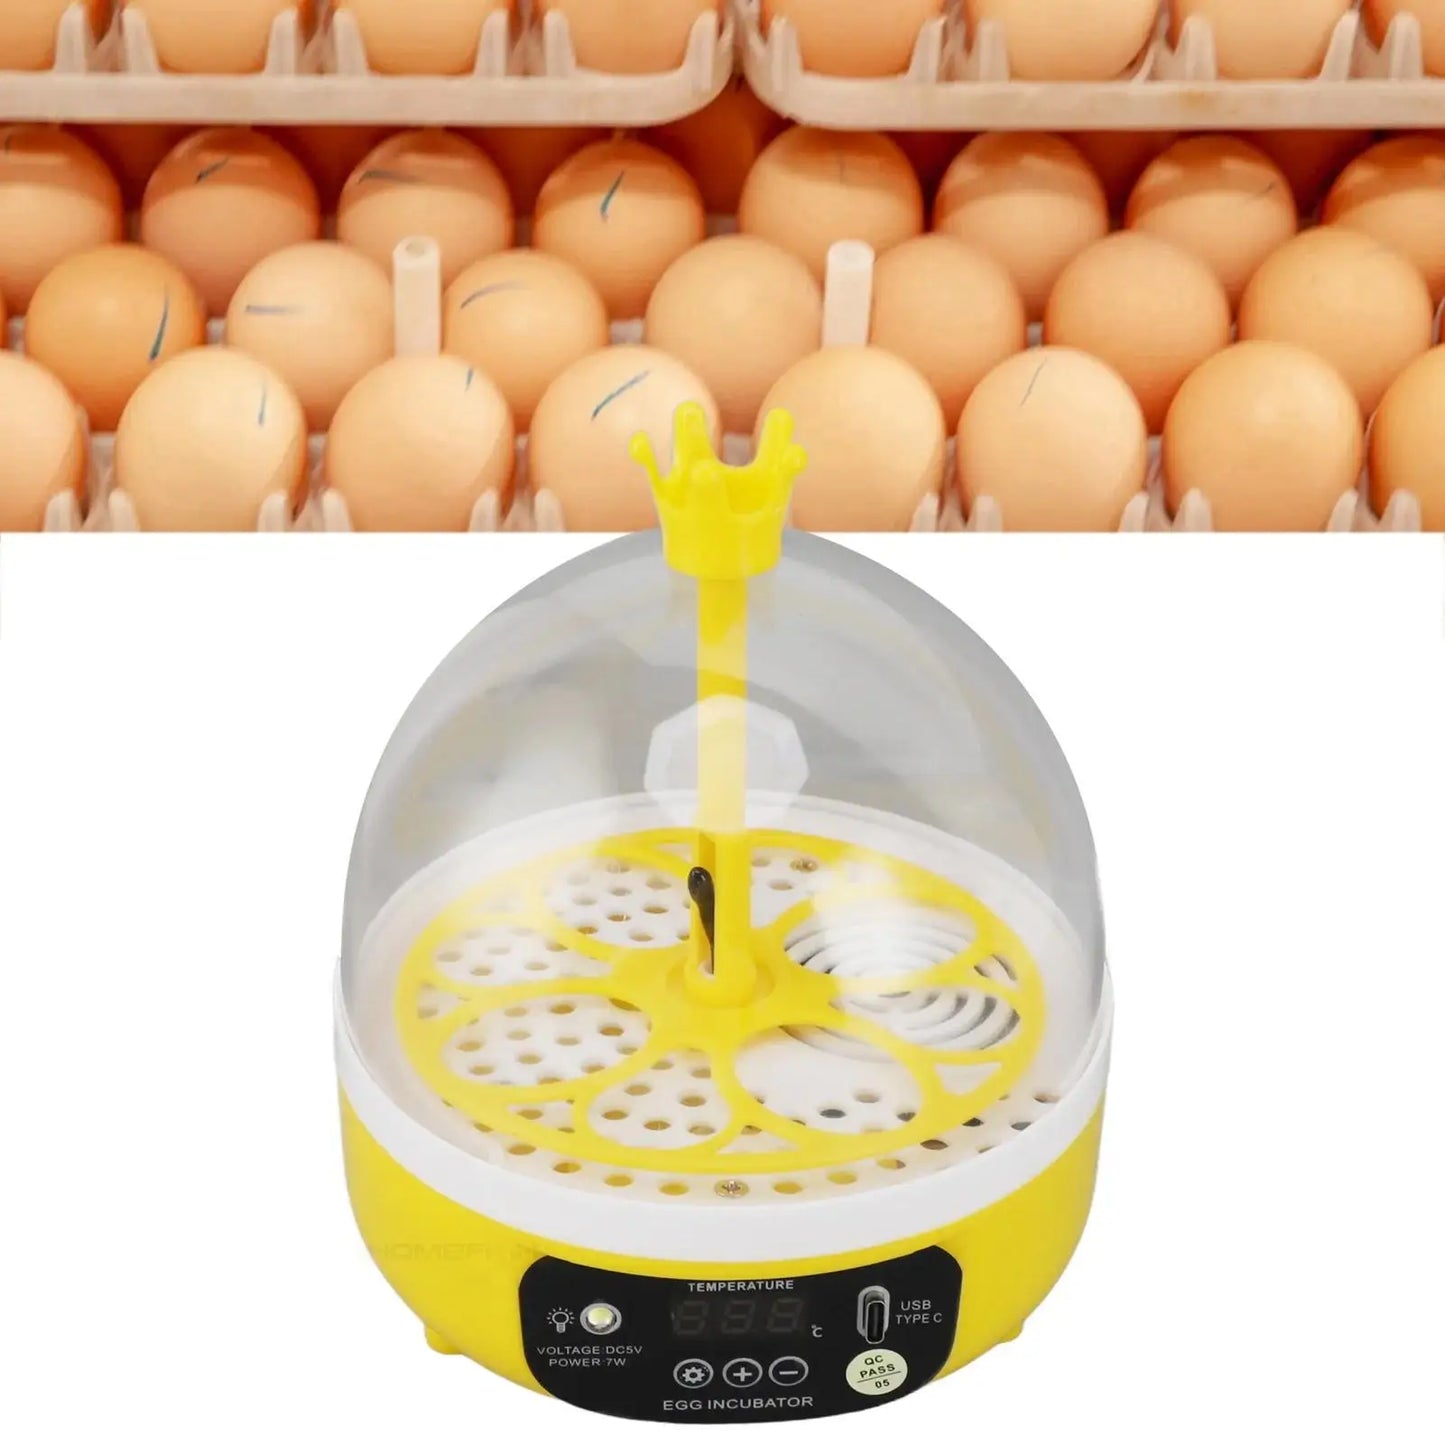
Step 3: Insert the insulation foam and arrange your fertile eggs on the egg tray (pointy end down or on their side).
Step 4: Plug in the USB cable and turn on the incubator. The automatic temperature and humidity control will activate.
Step 5: Monitor water levels daily and refill as needed using the spray or squeeze bottle.
Step 6: Turn eggs 2-3 times daily (or use automatic turner if equipped) for the first 18 days (chickens) or until 3 days before expected hatch.
Step 7: Stop turning eggs 3 days before hatching. Increase humidity slightly by adding more water.
Step 8: Watch through the clear lid as chicks pip, break through the shell, and hatch! (Incubation time varies by species: chickens 21 days, ducks 28 days, quail 17 days.)
Step 9: Once chicks are dry and fluffy (12-24 hours after hatching), transfer them to a brooder with heat lamp, food, and water.
Product Specifications:
Frequently Asked Questions
Q: How many eggs can it hold?
A: It holds approximately 4-9 eggs depending on egg size. Chicken eggs: 4-6 eggs. Quail eggs: 9-12 eggs. Duck eggs: 4-5 eggs.
A: It holds approximately 4-9 eggs depending on egg size. Chicken eggs: 4-6 eggs. Quail eggs: 9-12 eggs. Duck eggs: 4-5 eggs.
Q: What types of eggs can I hatch?
A: Chicken, duck, quail, goose, turkey, and other poultry eggs. It works with any fertile bird egg that fits inside the incubator.
A: Chicken, duck, quail, goose, turkey, and other poultry eggs. It works with any fertile bird egg that fits inside the incubator.
Q: Do the eggs need to be fertile?
A: Yes! Only fertile eggs (from a flock with a rooster or drake) will hatch. Store-bought grocery eggs are not fertile and will not hatch.
A: Yes! Only fertile eggs (from a flock with a rooster or drake) will hatch. Store-bought grocery eggs are not fertile and will not hatch.
Q: How long does it take for eggs to hatch?
A: Incubation time varies by species:
A: Incubation time varies by species:
- Chicken: 21 days
- Duck: 28 days
- Quail: 17-18 days
- Goose: 28-30 days
- Turkey: 28 days
Q: Is it difficult to use?
A: Not at all! It's designed for beginners. Simply add water, place eggs inside, plug it in, and the automatic controls handle the rest. The included English guide walks you through every step.
A: Not at all! It's designed for beginners. Simply add water, place eggs inside, plug it in, and the automatic controls handle the rest. The included English guide walks you through every step.
Q: Do I need to turn the eggs?
A: Yes, for the first 18 days (chickens) or until 3 days before hatching, turn eggs 2-3 times daily to prevent the embryo from sticking to the shell. Mark one side with a pencil to track turns. Stop turning 3 days before expected hatch date.
A: Yes, for the first 18 days (chickens) or until 3 days before hatching, turn eggs 2-3 times daily to prevent the embryo from sticking to the shell. Mark one side with a pencil to track turns. Stop turning 3 days before expected hatch date.
Q: How do I know if the temperature and humidity are correct?
A: The incubator automatically maintains optimal temperature (~37.5-38°C / 99.5-100.4°F). Monitor humidity by keeping the water reservoir filled according to instructions. You can use a separate thermometer/hygrometer for extra precision if desired.
A: The incubator automatically maintains optimal temperature (~37.5-38°C / 99.5-100.4°F). Monitor humidity by keeping the water reservoir filled according to instructions. You can use a separate thermometer/hygrometer for extra precision if desired.
Q: Can I see the eggs developing?
A: Yes! The clear viewing lid lets you watch the entire process without opening the incubator and disrupting conditions. You can also "candle" eggs (shine a flashlight through them) after 7-10 days to check for development.
A: Yes! The clear viewing lid lets you watch the entire process without opening the incubator and disrupting conditions. You can also "candle" eggs (shine a flashlight through them) after 7-10 days to check for development.
Q: What if the eggs don't hatch?
A: Hatch success depends on several factors: egg fertility, freshness (eggs should be less than 10 days old), proper storage before incubation, consistent temperature/humidity, and correct turning. Even with perfect conditions, not all eggs will hatch. Expect a 60-80% hatch rate for beginners.
A: Hatch success depends on several factors: egg fertility, freshness (eggs should be less than 10 days old), proper storage before incubation, consistent temperature/humidity, and correct turning. Even with perfect conditions, not all eggs will hatch. Expect a 60-80% hatch rate for beginners.
Q: How often do I need to add water?
A: Check water levels daily. Refill the reservoir as needed using the included spray or squeeze bottle to maintain proper humidity. Water consumption increases as eggs develop and especially during hatching.
A: Check water levels daily. Refill the reservoir as needed using the included spray or squeeze bottle to maintain proper humidity. Water consumption increases as eggs develop and especially during hatching.
Q: Is it noisy?
A: No! The incubator operates quietly and won't disturb your home, classroom, or workspace.
A: No! The incubator operates quietly and won't disturb your home, classroom, or workspace.
Q: Can I use it in a classroom?
A: Absolutely! It's perfect for classroom science projects, homeschooling, and teaching kids about life cycles. The clear window lets students observe without touching or disrupting the eggs.
A: Absolutely! It's perfect for classroom science projects, homeschooling, and teaching kids about life cycles. The clear window lets students observe without touching or disrupting the eggs.
Q: What do I do after the chicks hatch?
A: Leave chicks in the incubator for 12-24 hours after hatching to dry and fluff up. Then transfer them to a brooder (box or container) with a heat lamp, chick starter feed, and water. Keep them warm (32-35°C / 90-95°F) for the first week, then gradually reduce temperature weekly.
A: Leave chicks in the incubator for 12-24 hours after hatching to dry and fluff up. Then transfer them to a brooder (box or container) with a heat lamp, chick starter feed, and water. Keep them warm (32-35°C / 90-95°F) for the first week, then gradually reduce temperature weekly.
Q: Does it come with eggs?
A: No, fertile eggs are not included. You'll need to source fertile eggs from your own flock, local farms, hatcheries, or online suppliers.
A: No, fertile eggs are not included. You'll need to source fertile eggs from your own flock, local farms, hatcheries, or online suppliers.
Q: Can I hatch eggs from my backyard chickens?
A: Yes, if you have a rooster in your flock! Hens need a rooster to produce fertile eggs. Collect fresh eggs daily (no older than 10 days) and store them at room temperature (not refrigerated) until you're ready to incubate.
A: Yes, if you have a rooster in your flock! Hens need a rooster to produce fertile eggs. Collect fresh eggs daily (no older than 10 days) and store them at room temperature (not refrigerated) until you're ready to incubate.
Q: What's the success rate?
A: Hatch rates vary based on egg quality, fertility, and incubation conditions. With good-quality fertile eggs and proper care, expect a 60-80% hatch rate. First-time hatchers may see slightly lower rates as they learn the process.
A: Hatch rates vary based on egg quality, fertility, and incubation conditions. With good-quality fertile eggs and proper care, expect a 60-80% hatch rate. First-time hatchers may see slightly lower rates as they learn the process.
Q: How do I clean it after hatching?
A: After each hatch, remove all eggshells and debris. Wash the incubator, trays, and accessories with warm soapy water. Disinfect with a diluted bleach solution (1 part bleach to 10 parts water), rinse thoroughly, and air dry before the next use.
A: After each hatch, remove all eggshells and debris. Wash the incubator, trays, and accessories with warm soapy water. Disinfect with a diluted bleach solution (1 part bleach to 10 parts water), rinse thoroughly, and air dry before the next use.
Q: Can I open the lid during incubation?
A: Minimize opening the lid to maintain stable temperature and humidity. Only open briefly to turn eggs or add water. Never open during the final 3 days (lockdown period) when chicks are hatching.
A: Minimize opening the lid to maintain stable temperature and humidity. Only open briefly to turn eggs or add water. Never open during the final 3 days (lockdown period) when chicks are hatching.
Q: What if the power goes out?
A: Eggs can tolerate brief power outages (1-2 hours) without harm. For longer outages, wrap the incubator in towels or blankets to retain heat. Avoid opening the lid. Resume normal operation as soon as power returns.
A: Eggs can tolerate brief power outages (1-2 hours) without harm. For longer outages, wrap the incubator in towels or blankets to retain heat. Avoid opening the lid. Resume normal operation as soon as power returns.
Pro Tips for Successful Hatching:
💡 Start with Fresh, Fertile Eggs – Use eggs less than 10 days old from a flock with a rooster. Older eggs have lower hatch rates.
💡 Store Eggs Properly Before Incubating – Keep eggs at room temperature (not refrigerated), pointy end down, and turn them daily until you're ready to incubate.
💡 Candle Eggs on Day 7 – Shine a flashlight through eggs in a dark room to check for veins and embryo development. Remove any clear or non-developing eggs.
💡 Mark Eggs for Turning – Use a pencil to mark an "X" on one side and "O" on the other to track daily turns.
💡 Stop Turning 3 Days Before Hatching – This is called "lockdown." Chicks need to position themselves for hatching. Increase humidity slightly during this period.
💡 Don't Help Chicks Hatch – It's tempting, but chicks need to break out on their own to absorb the yolk sac and strengthen their muscles. Helping can cause bleeding and death.
💡 Keep a Hatching Journal – Track egg source, incubation start date, candling results, and hatch outcomes to improve future hatches.
💡 Maintain Stable Conditions – Place the incubator away from windows, drafts, heaters, and air conditioners. Temperature fluctuations reduce hatch success.
💡 Be Patient – Hatching can take 12-24 hours after the first pip (crack). Don't panic if chicks take their time!
💡 Have a Brooder Ready – Prepare a warm, safe space with a heat lamp, food, and water before chicks hatch.
Mini Incubator vs. Professional Incubator vs. Broody Hen